S250/G Commo Shelter Camper Conversion
©2008 David P. Dusenbury
(Note on this webpage: I had a build thread on a local 4x4 forum. To make the page, I just cut and pasted my comments and pictures from that thread. Maybe one day I'll clean this up some and make a better write-up. Maybe not.)
My wife wanted to get out of the tent, off the ground, and into air conditioning (and me too, a bit). Like everybody that plays with big toys, I had a hard time figuring out what to do that would let me tow the Jeeps too, short of a toterhome.
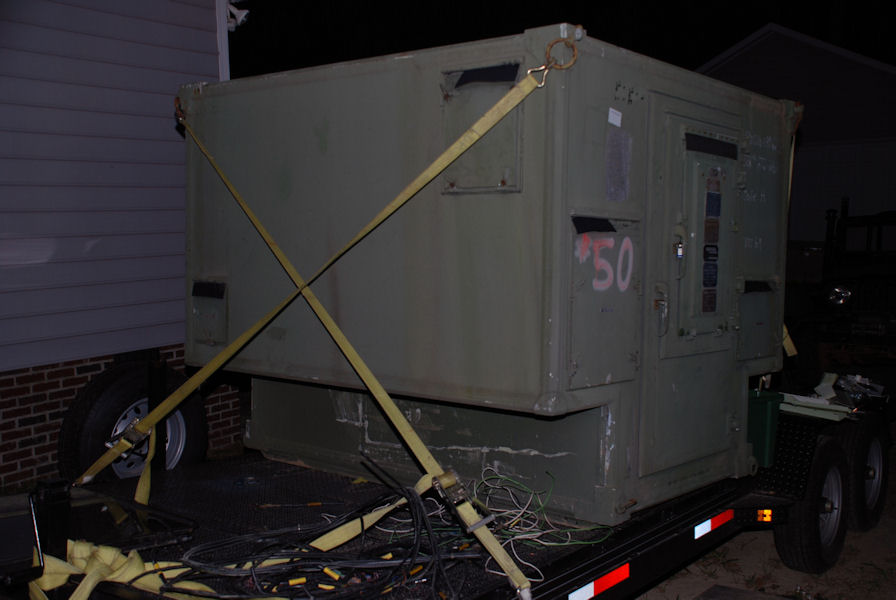
Anyway, the project begins...on March 8, 2008, I bought this:
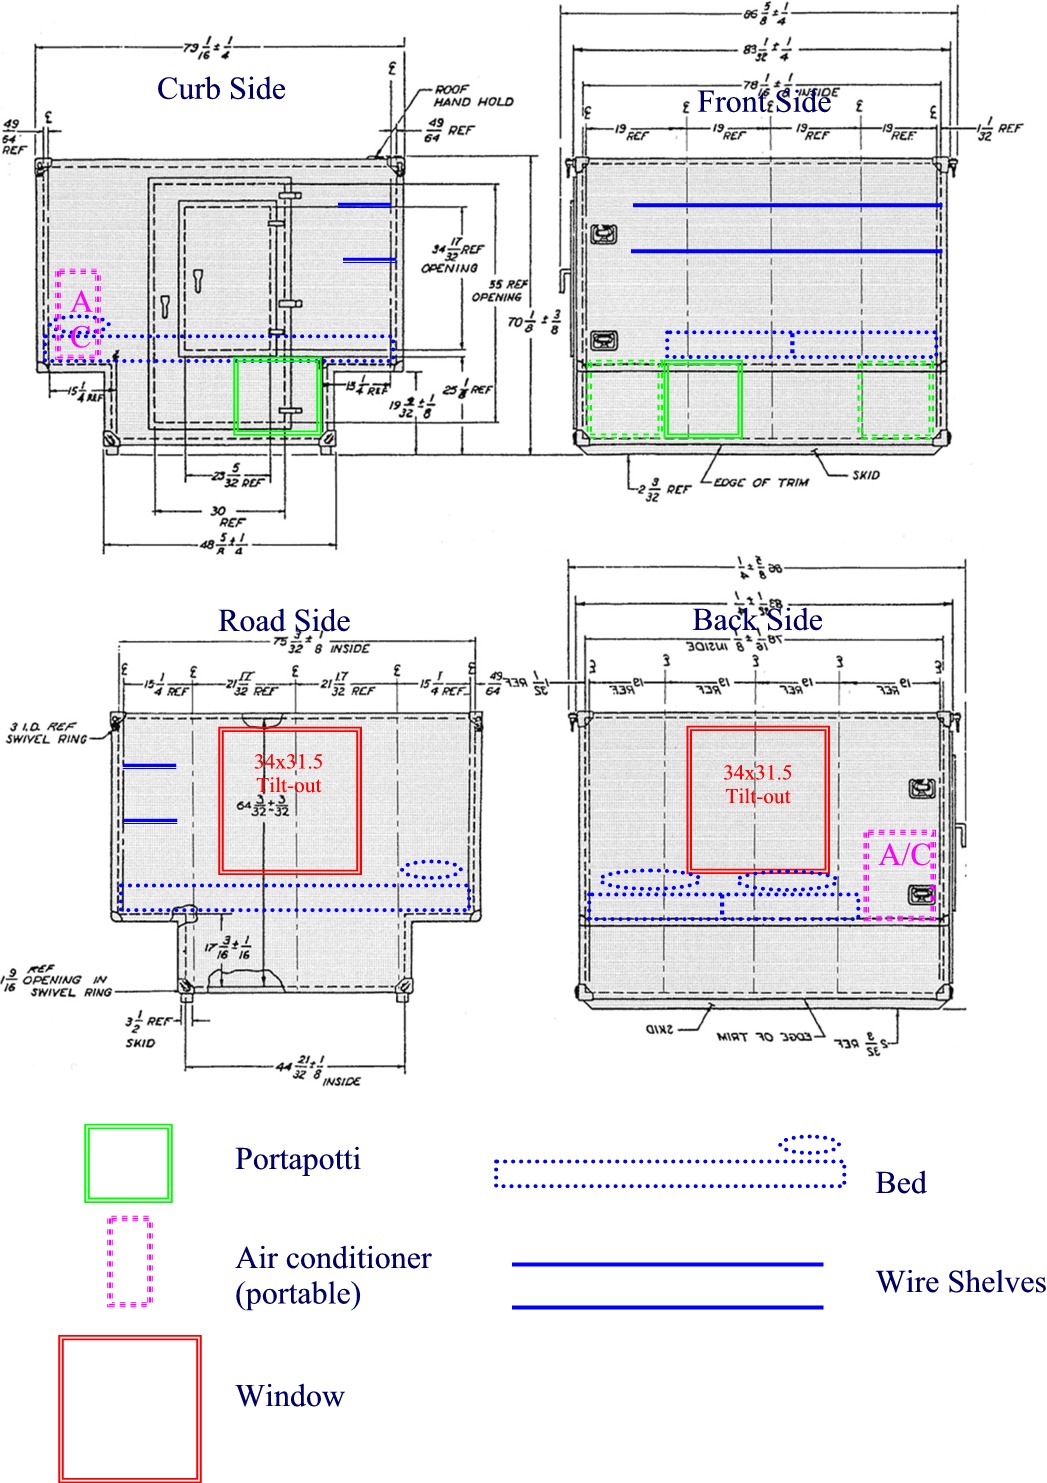
Inside, it measures about 75" wide by 78" long and 64" tall. Here is a link to a dimensioned drawing:
http://www.wenzlau.com/img/photos/drawing_s250.gif
It weighs approximately 800 pounds, plus whatever I put in it. Basically, the plan is to have a sectional bunk (you can lift out center cushions and plywood to make more room), a porta-potti, and a/c unit. Not much more than that, because there just isn't room, and I want to keep it under 1200# total.
I've spent the first week stripping out a ton of conduit and other junk. It is already wired (60amp main breaker, 4 15a circuits, 2 @30a). It is wired for 115 only, and I am making up a power cable for it to connect to a campground 30a-115v service.
I still need to install the window. If anybody in North Carolina is hunting camper parts, I bought two nice windows for cheap from an RV salvage place up in Liberty (just N of Siler City off 421).... they have a website.... www.nationalrecoveryservice.com
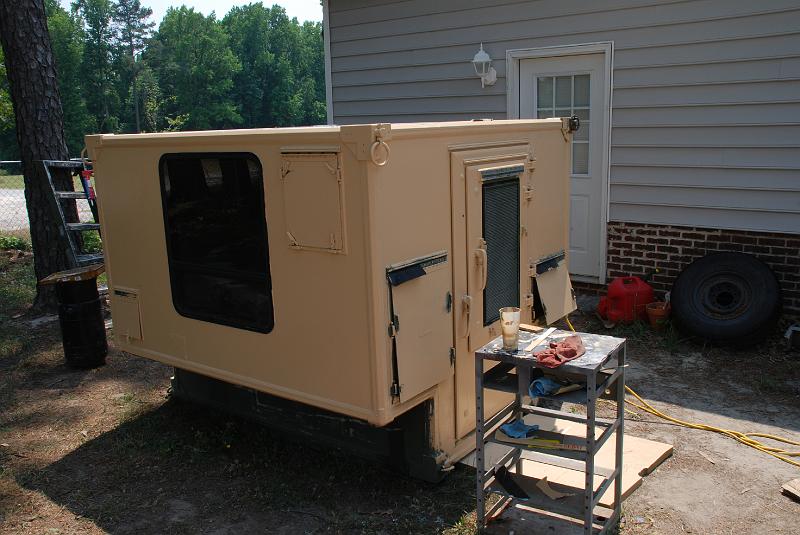
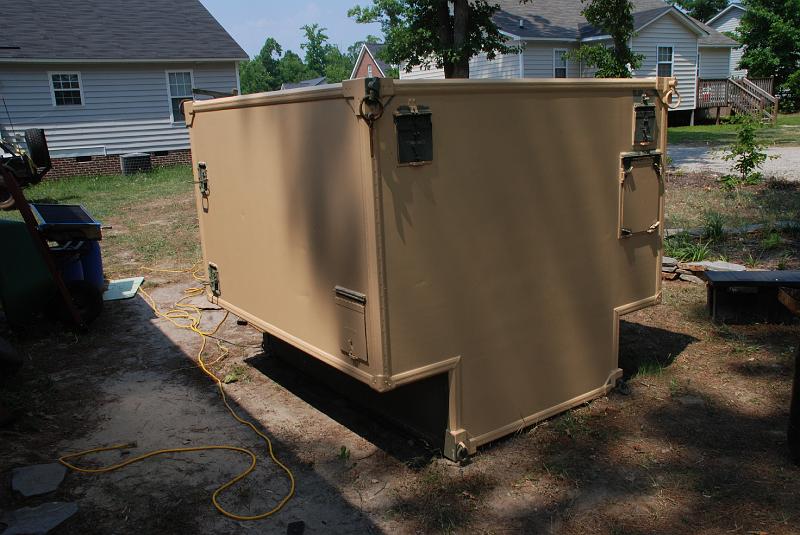
Right now, it's ready for paint, then upholstery. We've seen too many hacked up 'man caves' with little more than 2x4 and plywood bunks, and we want this to look as good, and be better built, than a store-bought camper.
I plan to use it 2 ways -- first is on the big flatbed trailer (22'), but it will be turned 180* from the way it is in the picture so the door is on the normal RV side (to the curb) since most sites are laid out for that, and it will also be pushed all the way to the front of the trailer deck. I am also modifying my military M101A2 trailer so the shelter will fit. That would be for Jeep-less camping trips, or pulling with the 715. The shelter has tow points and skids, and both trailers are set up with winches, so it will be easy to load/unload/transfer the camper.
It is insulated, its a foam-core construction, skinned by aluminum on both sides. RIght at 1-1/2" thick. I'm painting it a desert tan color to reduce solar gain.
A "high strength aluminum alloy" frame is on 19" centers, plus the heavy aluminum outer corners and edges. They are made to be air lifted, crane loaded, etc, and they even had a winch and pulley bar kit for the big trucks to lift one end off the ground, tilt it up, and drag it into the bed of the truck...so they are made to be rough-handled to some degree.
Finally, some pics.... (More pics below on this page), this link takes you to my camper album)
I used jalbum to build the gallery.... for quick navigation, click on the righthand third of a pic to go the next photo. (click on left side goes back, click in middle goes to index page).
If you want to save a pic, just go to the address bar of your browser and change the .html to .jpg and hit enter...that'll load the image alone in a window where you can right-click-save.
http://www.sanlee.com/s250/s250album/index.html
A few misc. notes:
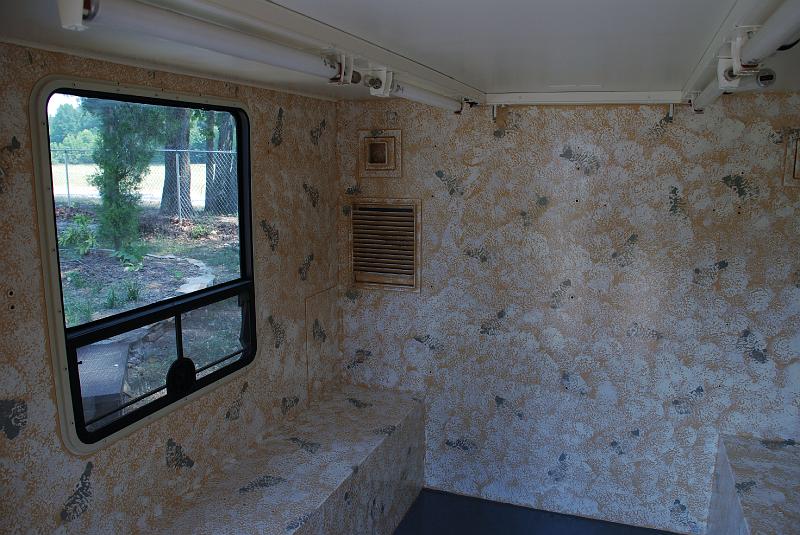
* the white splotches inside are primer where I covered some bare aluminum after sanding out some rivets where conduit was
* don't mind my 12ga stuck in the exterior outlet..thats just to run the lights until I make up a power cable. The round screw-off caps you see are funky electrical connectors, Ontario Surplus has the cables to match. I am making one up about 25' long ending with a TT30 plug (campground/rv 30a 115v).
* the double doors are basically there in case it's in a truck or trailer and the tailgate is up, so you can't get locked in
* the doors are padlockable, but there is a thumbscrew on the inside of the door that releases the padlock hasp, so you can't get locked in.
* the big vent on door is light-tight
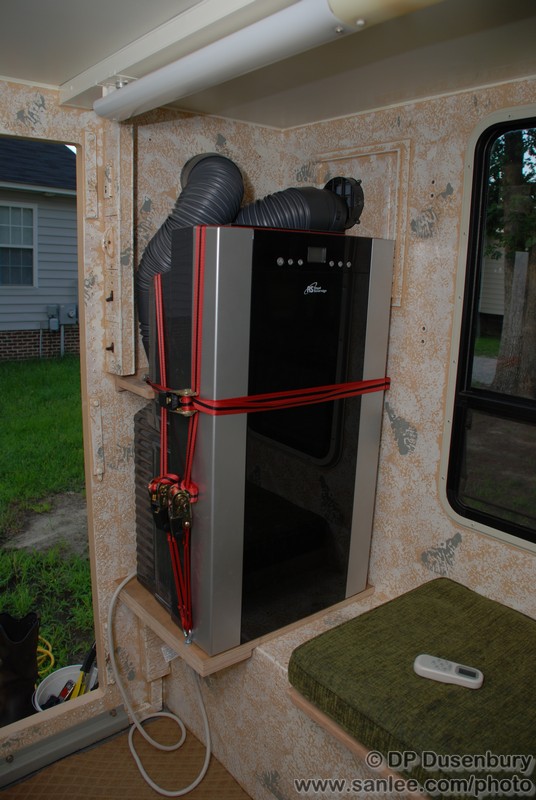
* if you do buy one, don't put a rooftop a/c unit on it -- the roof holds about 1/4" of water when it rains. The gaskets/clamping system on a rooftop a/c unit can't hold back the standing water...folks have tried this and failed. I am using a portable a/c unit that vents outside via a dryer-vent type hose.
* the CARC paint on the outside and is bad stuff for your lungs, either when sprayed or if sanded. Wear a mask if you sand it down before paint.
* ain't seafoam green lovely?
Here is a .jpg of the design I'm working with... the only thing you really can't see (I deleted the overhead view) is that the bunk is in 4 sections...the 2 cushions that are over the existing benches are permanent, there are 2 center sections that lift out to make more floor space if needed.
Portapotti will slide up under the bunk when not needed. It will be restrained by footman loops and velcro straps...I don't want it rolling around.
Budget is right at $2000. We are really not cutting any corners...like the $450 heatpump a/c & heat instead of a cheap window unit....interior trim is oak, with oak veneer plywood bunk. Upholsterer is making the cushions for us, etc.
So far, we are staying right on budget. Got a few deals on some stuff that came in cheaper, and added a few things that offset that. As usual, I didn't budget for paint supplies, just paint...I think the supplies are gonna cost as much or more than the paint (thinner, brushes, blue tape, tray liners, roller covers, etc).
The window is out of an RV, cutout is 30x33". Bottom tilts out.
The paint is from our local Davis Paint store, it's a gloss oil-based exterior paint. We picked a color that was somewhat like the Army desert tan.
This is the inside...wife did the sponge painting... base coat is same as the outside, lighter color is a light tan that looks really white (thanks to Lowe's mixing), and the 'footprints' are OD green, that turned out really looking gray.
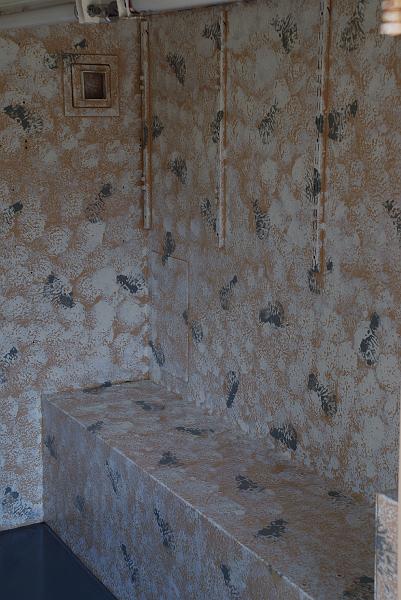
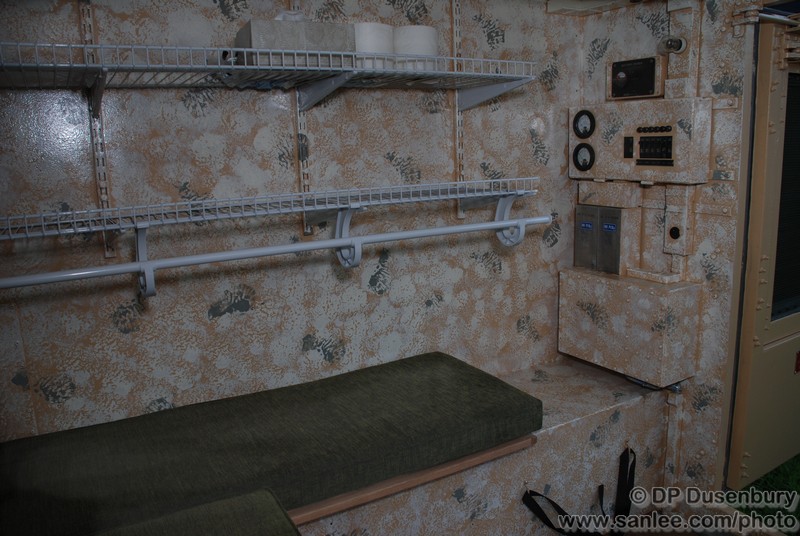
This is the opposite wall...you can see the vertical shelf brackets where 2 rows of wire shelving will go.
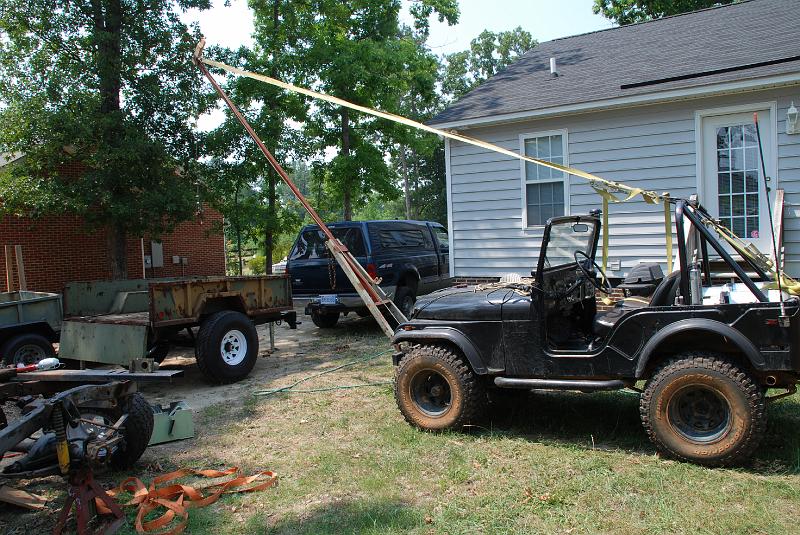
The "Jeep Crane" that has saved my butt and back several times the past few days. I had just used it here to set the bed on the trailer.
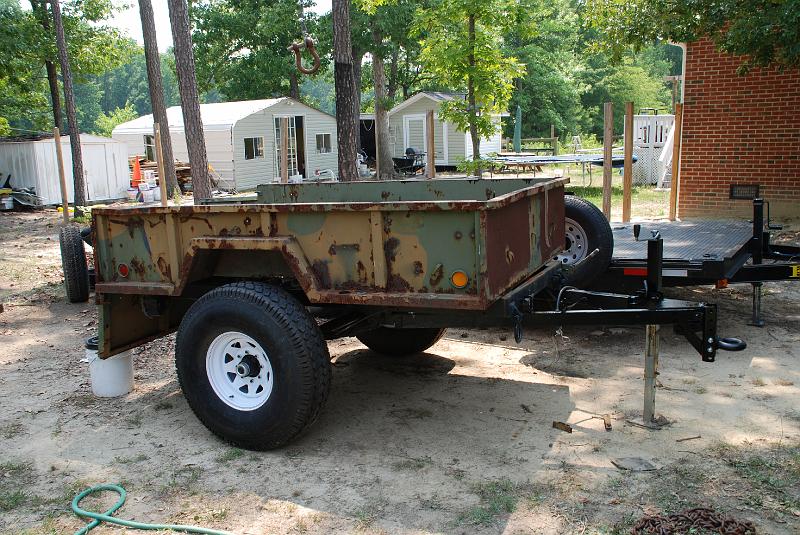
Finally, the M101A2 trailer that will tote it if I'm not taking the Jeep along. Tires are 305/85R16's that are close to the size of the XZL's on my M715. Wheels are 16x8's. I just now swapped out the military axle for a Dexter electric brake axle, and removed the hydraulic surge hitch and welded on an adjustable lunette eye. I'm painting the body the same color as the S250.
The Interior:
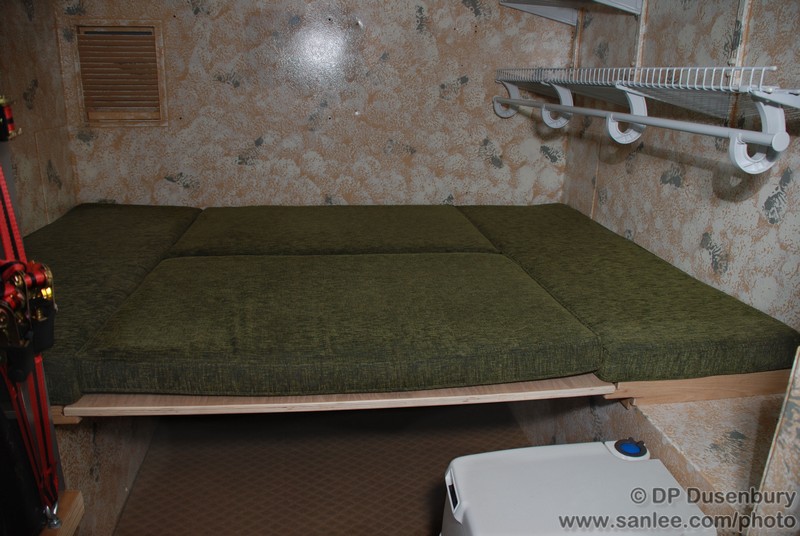
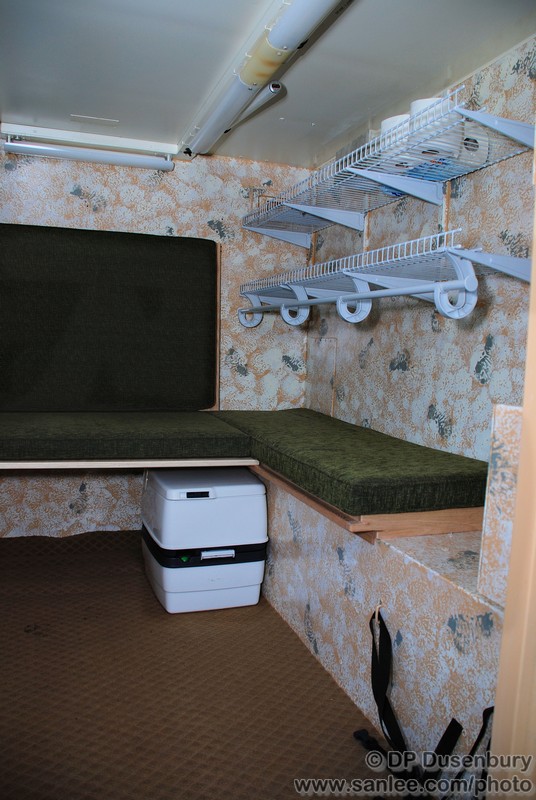
Here is the bunk in the sleeping position. Cushion is 3" foam, made into 4 pieces. The two center sections will lift out and lean against the back wall to make more floor space. There is about 2' of floor space with the bunk in this position, enough for the portapotti and getting in and out the door. Wood is oak and oak veneer plywood, yet to be stained. I have aluminum hat channel screwed up under the plywood inserts to keep them from bowing.
Here is the bunk with one cushion/panel removed. This is how we usually set it during the day to have more room for dressing, etc. We can just pull the corners off the fitted sheet up front, and fold back in half on the remaining bunk, so we don't have to fully re-make the bed every night. Also you can see that the portapotti slides up under the rear bunk section during the day. Straps you see in lower right corner are for the portapotti when travelling.
This is the wall opposite the window (to the right as you enter). 2 rows about 6' long of adjustable shelving. Plenty of room for our clothes and stuff for a long weekend. (can also put duffel bags or suitcases under the front half of the bunk for a longer trip).
Finally, the a/c unit as described in an earlier post. The straps were the only ones I could find before our first trip. I have since found some black straps, but have not put them on yet.
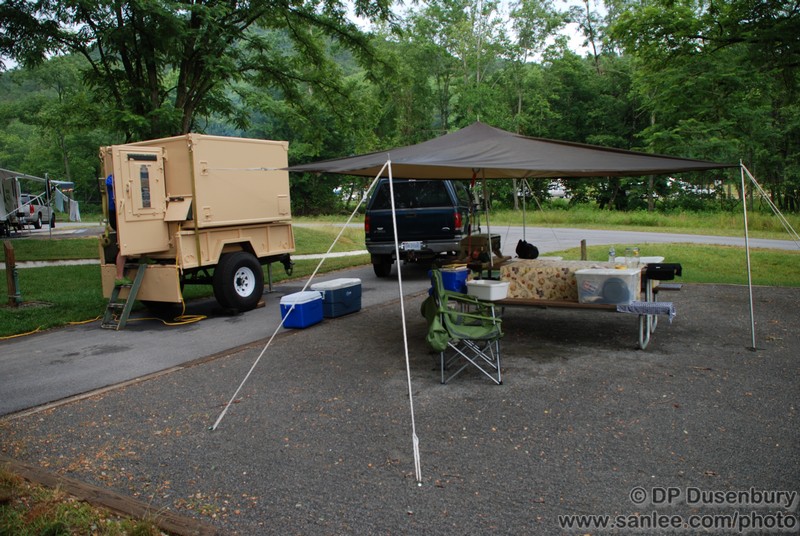
After one hell of a week working on the camper, our plans changed a bit for our shakedown trip. We planned to leave Thursday morning, but finally finished it and left at 4pm Friday (June 12th), paint still wet.
Ended up staying at Stone Mountain State Park. It's the first state park in the NC system to have water/electric hookups for RV's.
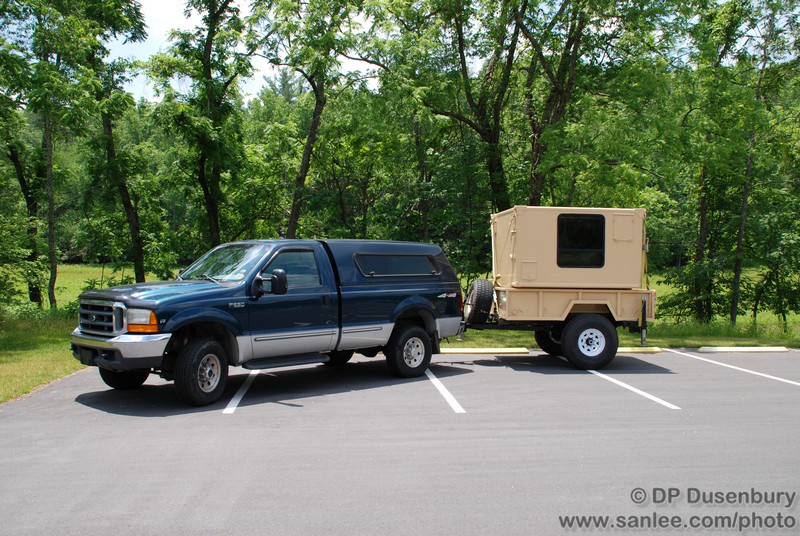
Here is the truck and camper in the parking lot for one of the trails:
Our campsite: (most of the sites were about like this...not too close to your neighbors, compared to most RV places.)
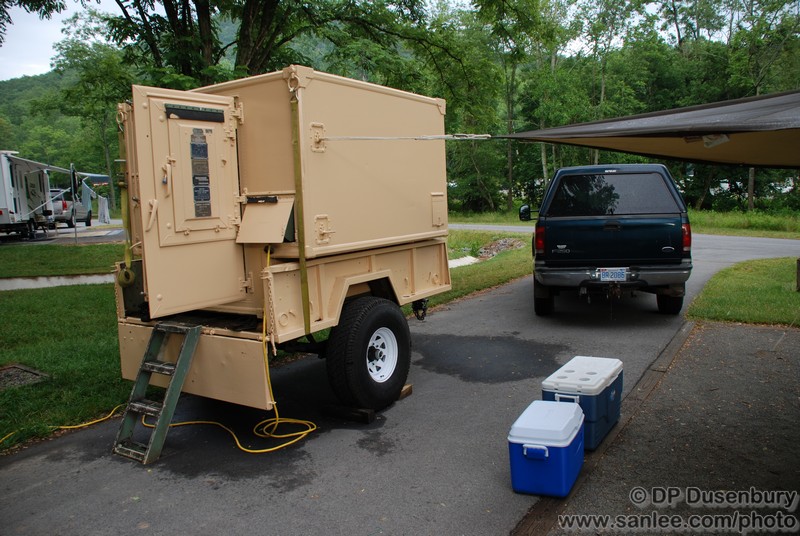
The camper...the last thing I did before leaving was the ladder, and it didn't get any paint.
Only found a couple of things to add/change to the camper. Need a small shelf at the head end of the bed for glasses, water bottle, etc. The A/C worked great, only problem is that it blew on us too directly, I need a diffuser/deflector for the air outlet. Still need to build a spare tire mount.
The only problem we had with it at all was a bit of trailer sway at first...even though the axle is set back a bit, and the camper was all the way forward, the 2 heavy items inside are in the back (80lb a/c and 40lb porta-potti (w/water). I had to ratchet strap the spare tire to the tongue (were it will be mounted anyway), and put the 2 coolers in the front of the camper to the enough weight on the tongue.
All in all, I'd do it again, with very few changes.
This project went from May 8th to June 12th, start to finish (except for a few loose ends).
Finally, here it is used for what I built it for....on the flatbed trailer, with my M715 Jeep 5/4 ton pickup loaded behind it.